To create a support case for your account contact, follow the steps below:
-
Navigate to the Salesforce support application
-
Click on the "New" button on the top right of the screen
-
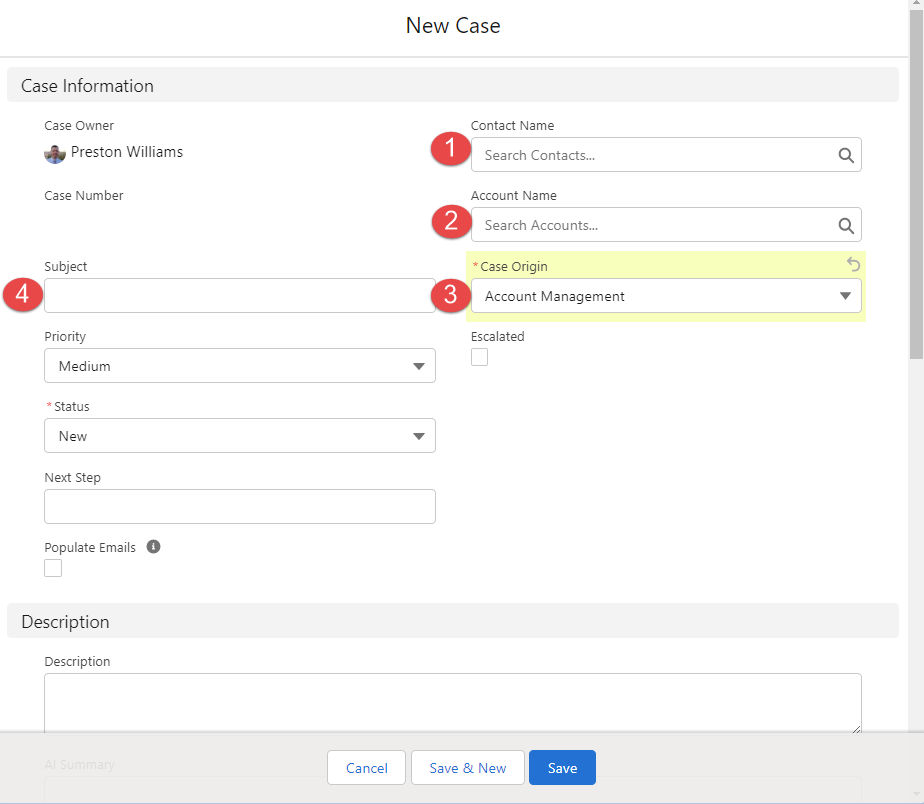
In the support case form, fill in the following fields:
- Contact Name: Enter the name of the contact who is experiencing the issue.
- Account Name: Enter the name of the account associated with the contact.
- Case Origin: Select "Account Management" from the dropdown menu.
- Subject: Provide a brief description of the issue or request.
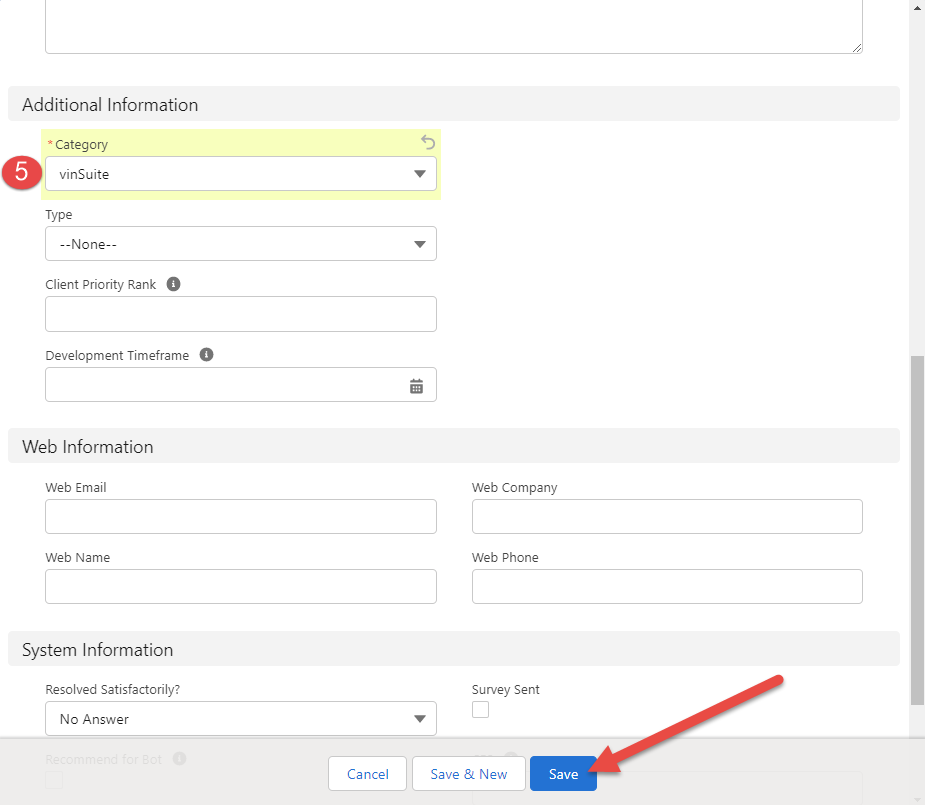
- Category: Select the appropriate category for the support request from the dropdown menu.
-
Once you have filled in all the required fields, click on the "Save" button located at the bottom of the form to create the support case
-
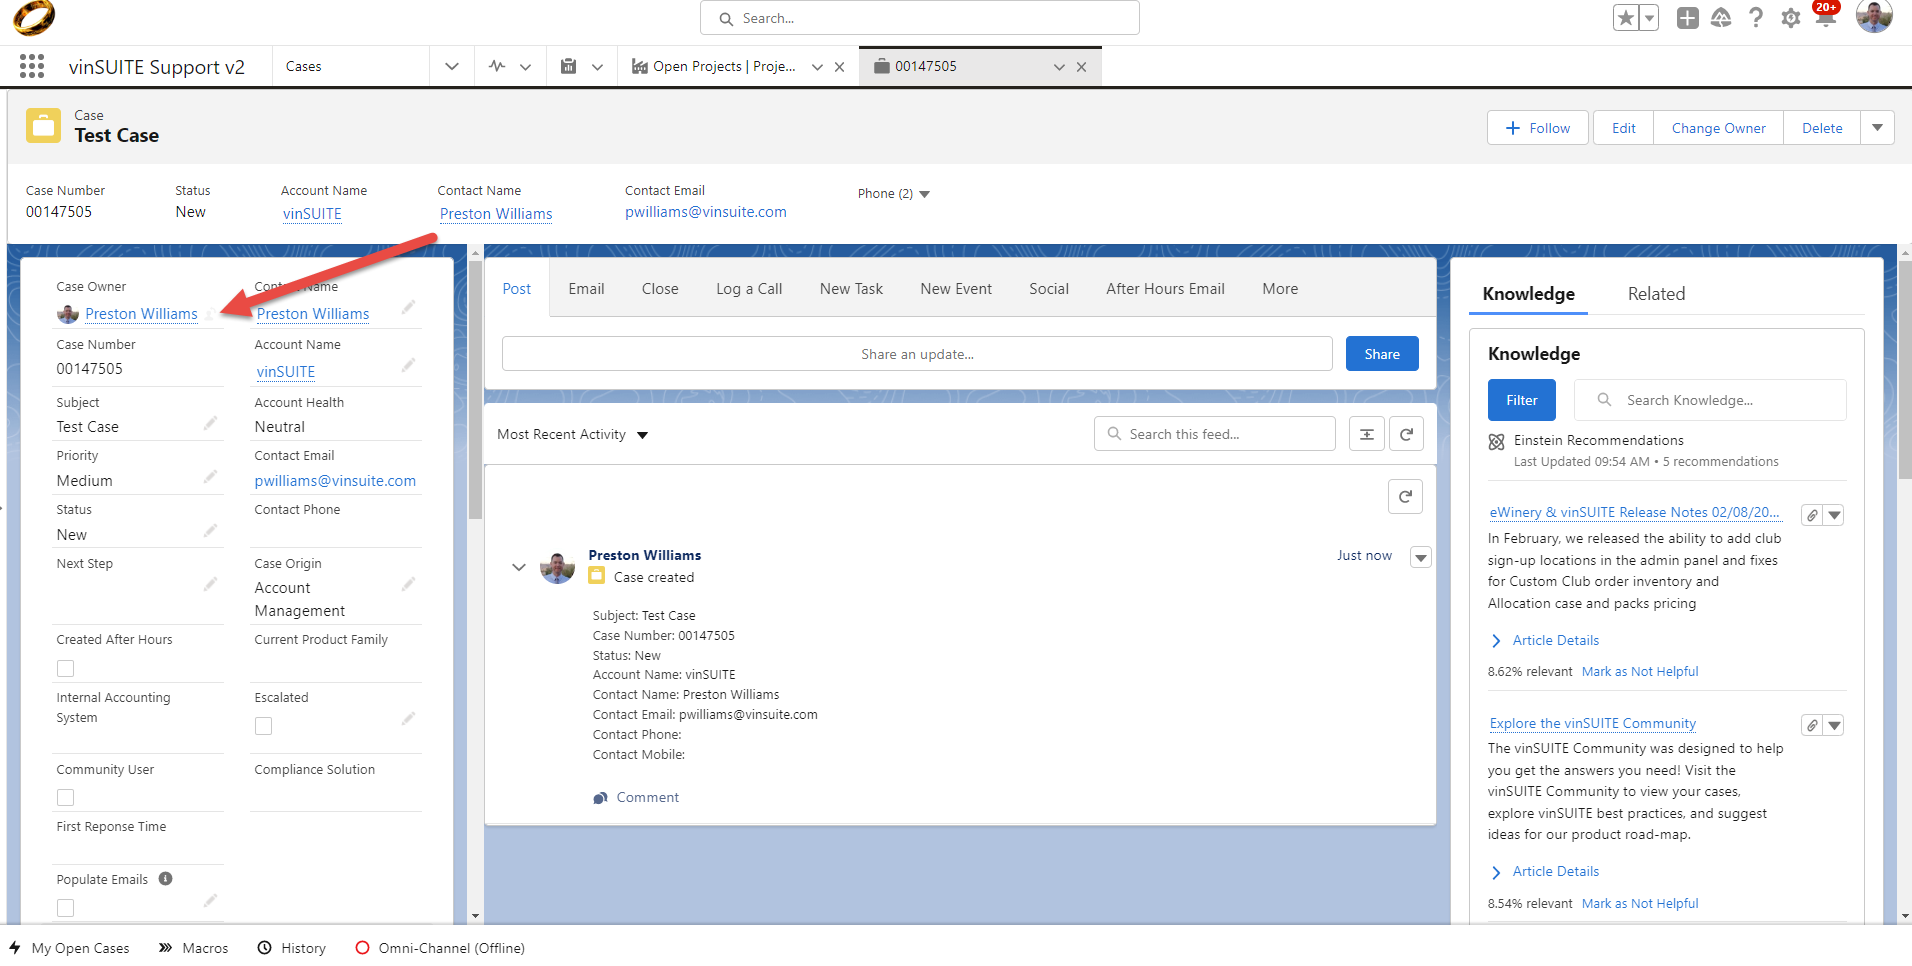
Reassign the case to the "Unassigned Queue" by following the steps below:
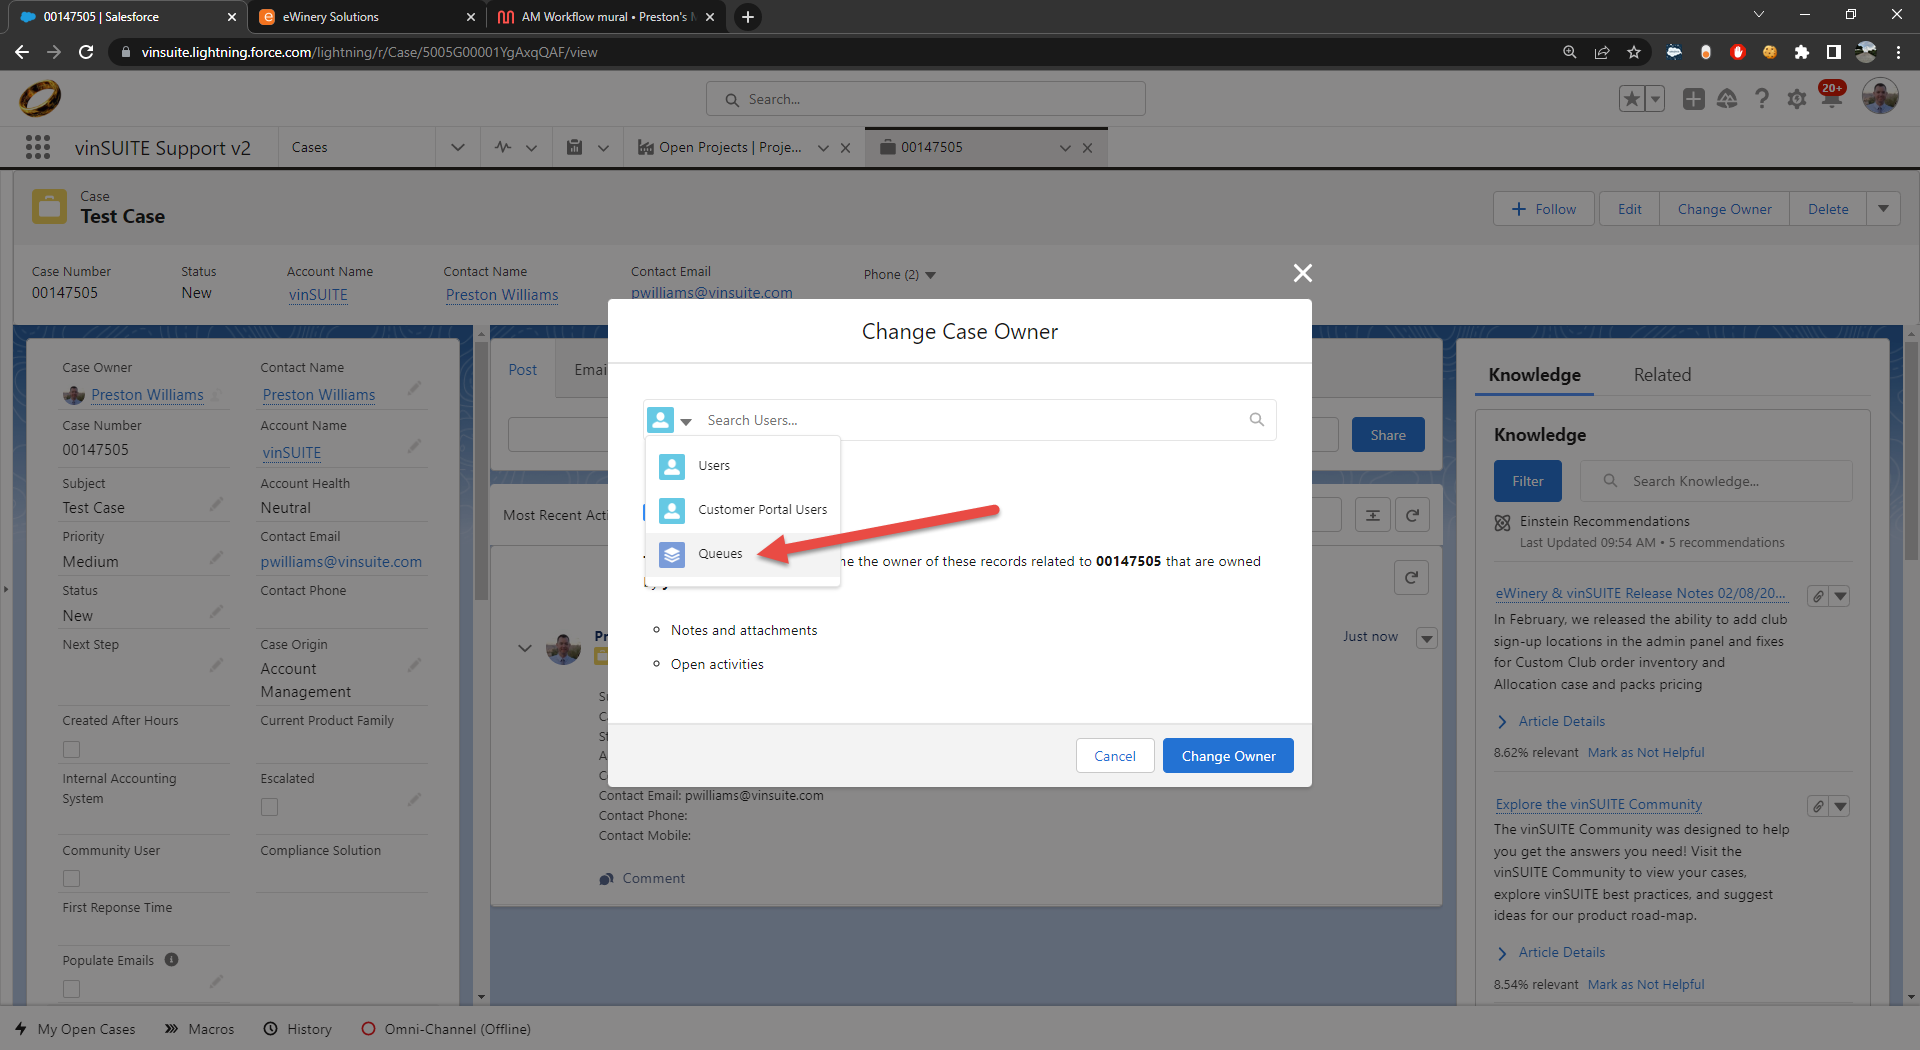
- Click on the "Change Case Owner" icon next to the case owner name.
- Change the object from "Users" to "Queues".
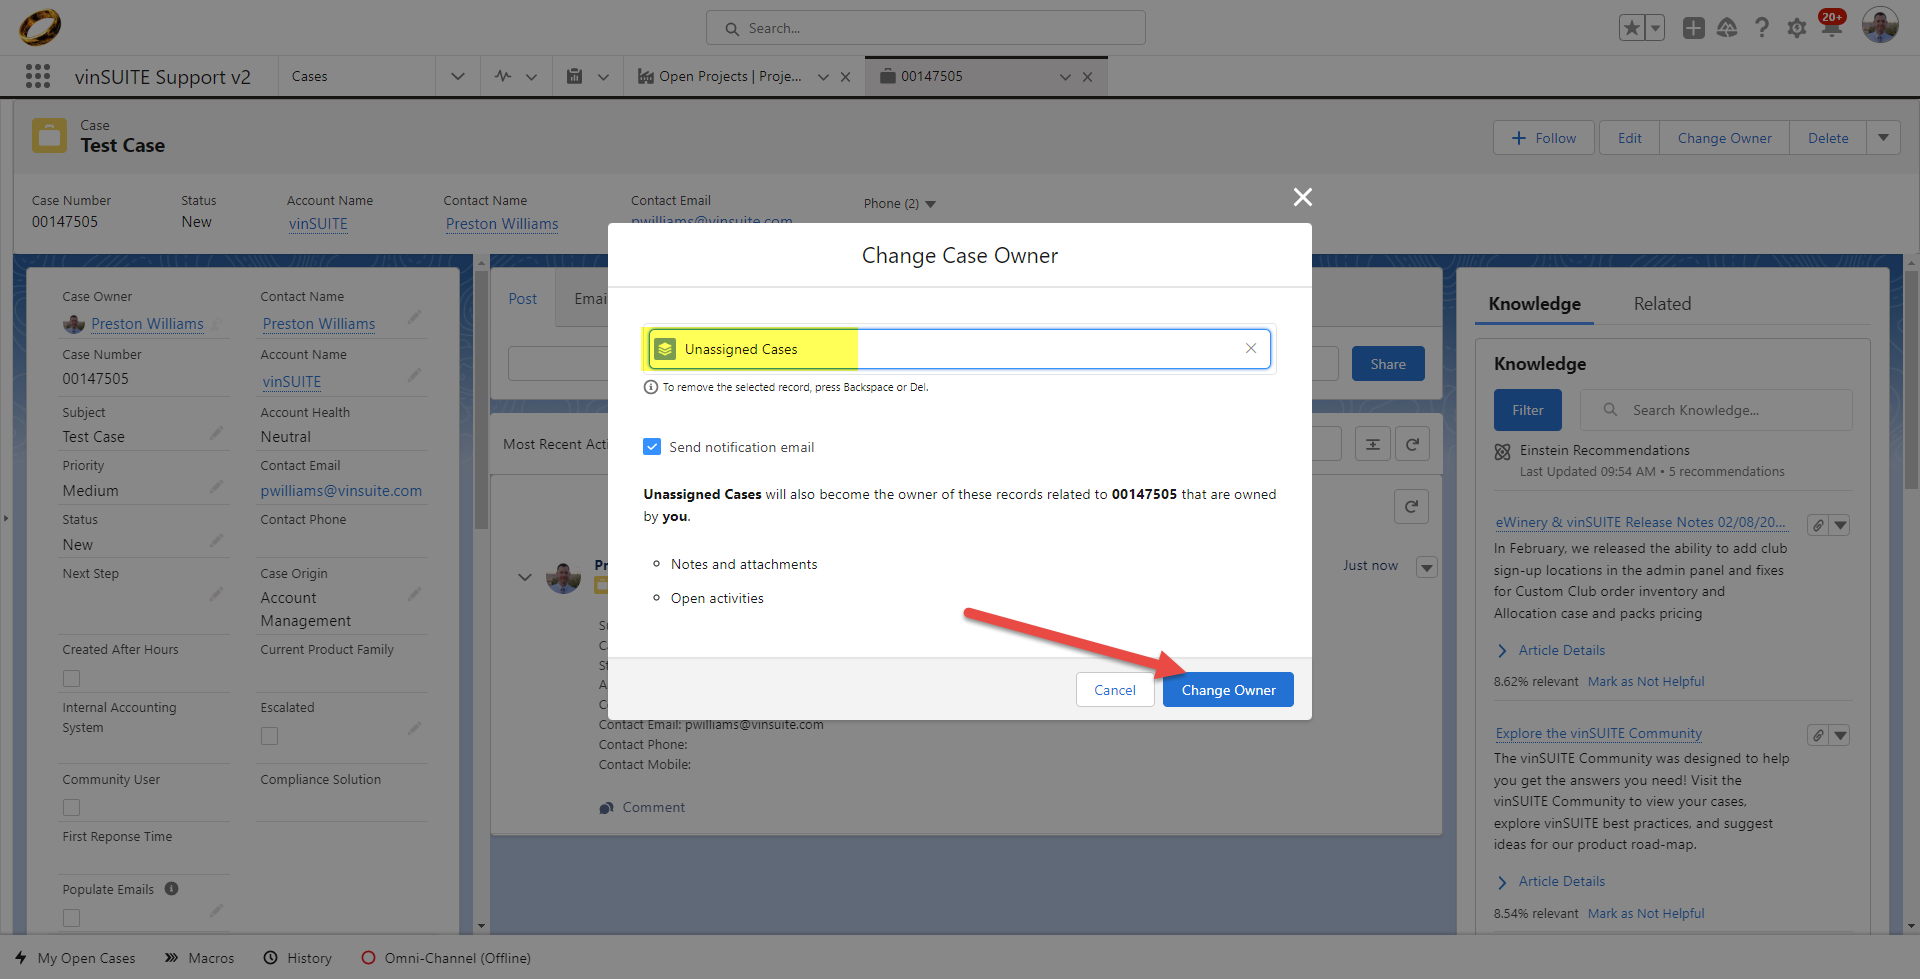
- Search for "Unassigned Cases" in the search bar.
- Click "Save" to assign the case to the "Unassigned Queue".