Set Up Custom Club
Note: These steps are only applicable if you contact the vinSUITE Client Services Team to enable custom clubs. If you are interested in using custom club, please contact the vinSUITE Client Services Team at support@vinsuite.com. Custom Club is accessible in both the eWinery and vinSUITE admin panels and Base 3 websites.1) First, you must decide on the name of your custom club. You can call it something specific to your winery, or simply keep labeled as "custom club."
2) Next, decide if the custom club orders that are finished on your website should be set to Pending Custom Club Order or a Completed status in the eWinery admin panel.
Pending Custom Club Order status: Selecting this status allows club members to complete their custom orders on your website. All custom orders will remain unprocessed until an admin user manually processes the orders.
Benefits | Considerations
- More Control - You have the ability to personally review or modify every custom club order before it is processed and shipped to the customer, providing a superior customer experience.
- More Time- You will be involved in processing club orders, which could mean spending more time on club batches.
Completed status: Selecting this status allows club members to complete their custom orders on your website and vinSUITE will automatically process these orders. Any orders with a completed status will be ready for shipping.
Benefits | Considerations
- Orders Automatically Completed - Custom orders will be processed and ready to ship without any manual interaction, saving you time and tasks on your to-do list.
- Less Control - You may not be able to review or modify a custom order before it is shipped to the customer, especially if orders are set to ship immediately.
For more information about order statuses, please visit the eWinery Orders Glossary.
3) Please contact the vinSUITE Client Services Team at support@vinsuite.com to enable custom club.
4) Once custom club is enabled, you will need to:
- Establish a club level for your custom club
- Add members to the custom club level
- Personalize your custom club emails
- Include any notes for custom club members on your website
- Convert a regular club level to a custom club level
- Personalize your custom club emails
- Include any notes for custom club members on your website
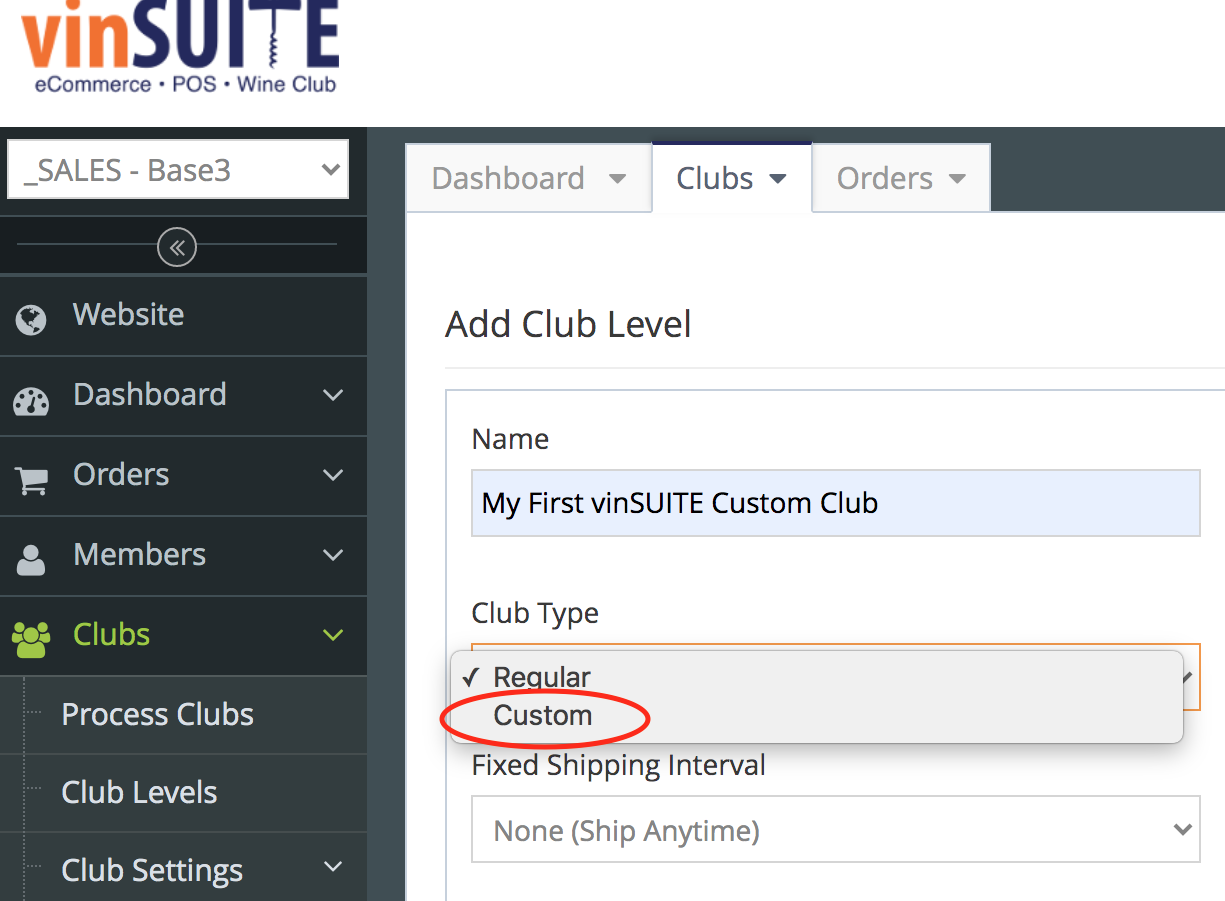
- Enter the Name for the custom club level.
- Toggle to Active if you want club members to be able to sign up for this club online (not necessary to process clubs)
- Choose Club Type: Custom (Fixed Rate and Fixed Bottle Count will be determined in the batch)
- Choose your Fixed Shipping Interval if you want to set the frequency of club shipments. The batch will require you to enter dates for the fields "Add New Club Members Until" and "Exclude Members With Club Shipments After"
- Redirects are available but not advised for Custom Club levels
- Click Save
Add Members to Custom Club Level
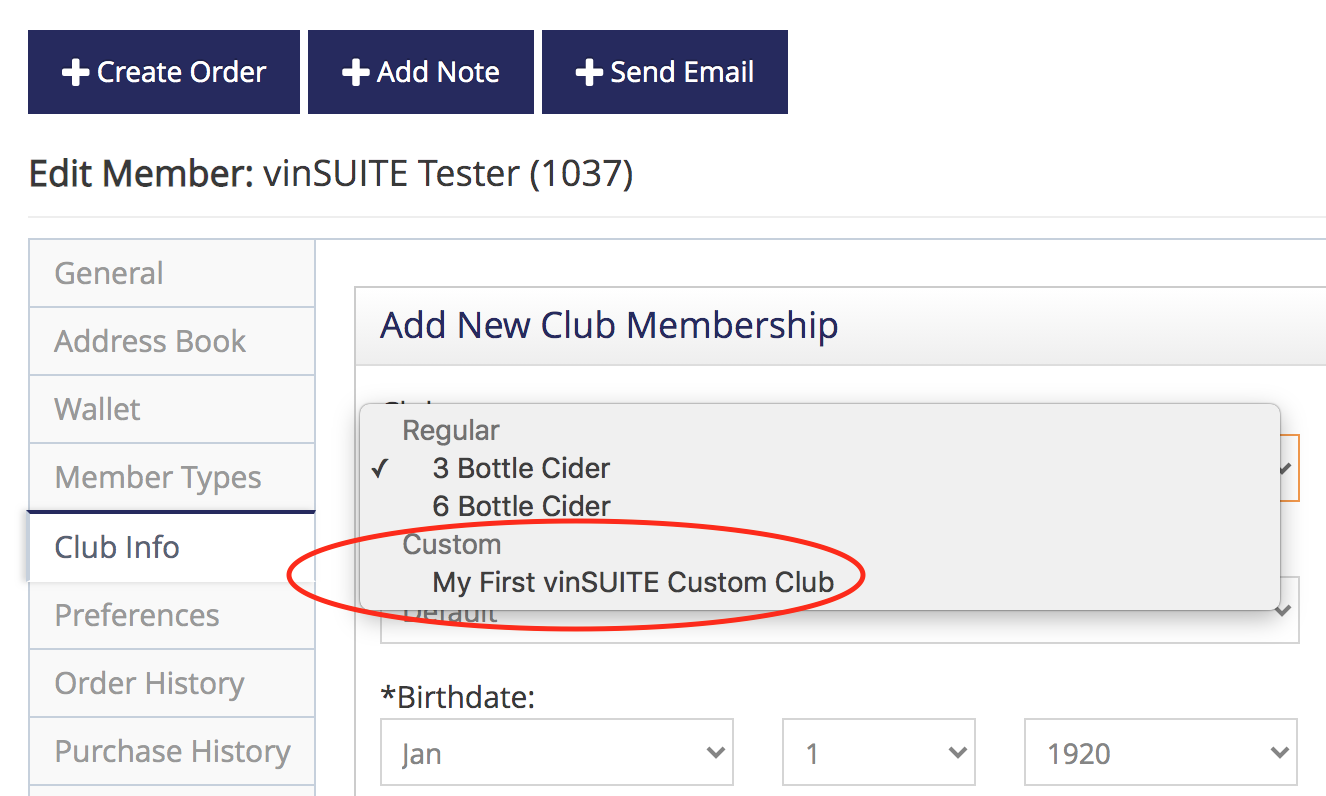
- Navigate to the Members section in the admin panel. Search for the appropriate member and select them from the members list.
- Navigate to the Club Info tab and click 'Add Club Membership'.
- Select your new custom club from the Club drop-down menu.
- Update any appropriate information about the member and click the 'Save' button.
Convert a Regular Club Level to Custom Club Level
Note: When you convert a regular club level to a custom club level, you MUST CLOSE ALL OLD BATCHES for the regular club level before converting to a custom club level.Additionally, please note that ALL members within that regular level will be converted to the custom club level.
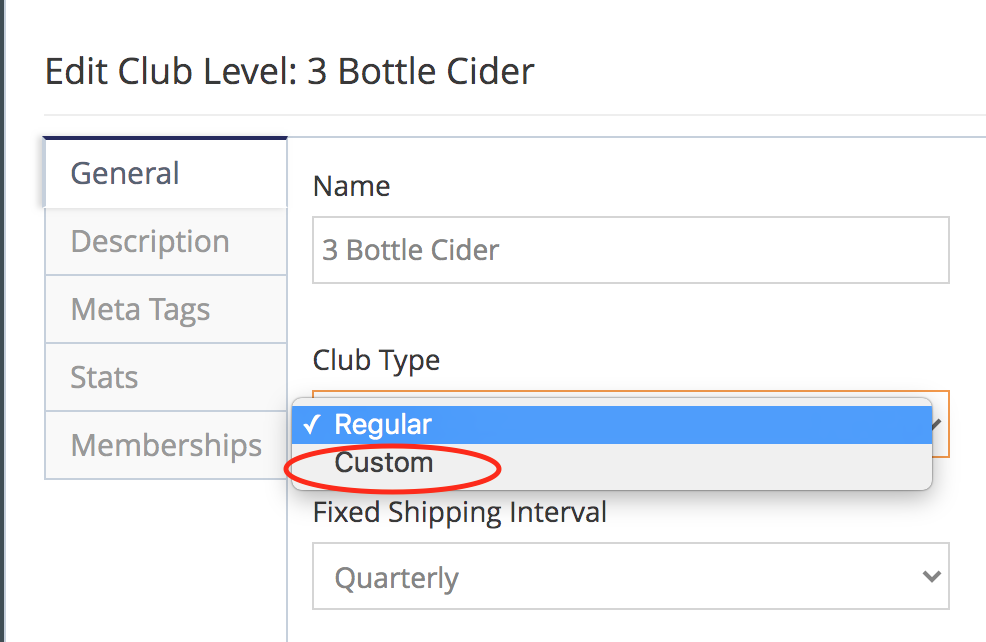
- Navigate to Clubs in the site tree
- Select Club Levels
- Choose your Regular club level to edit and click the pencil icon
- For Club Type, choose Custom from the dropdown
- Click Save to convert the club level to Custom and all club members to custom club members
Personalize Custom Club Emails
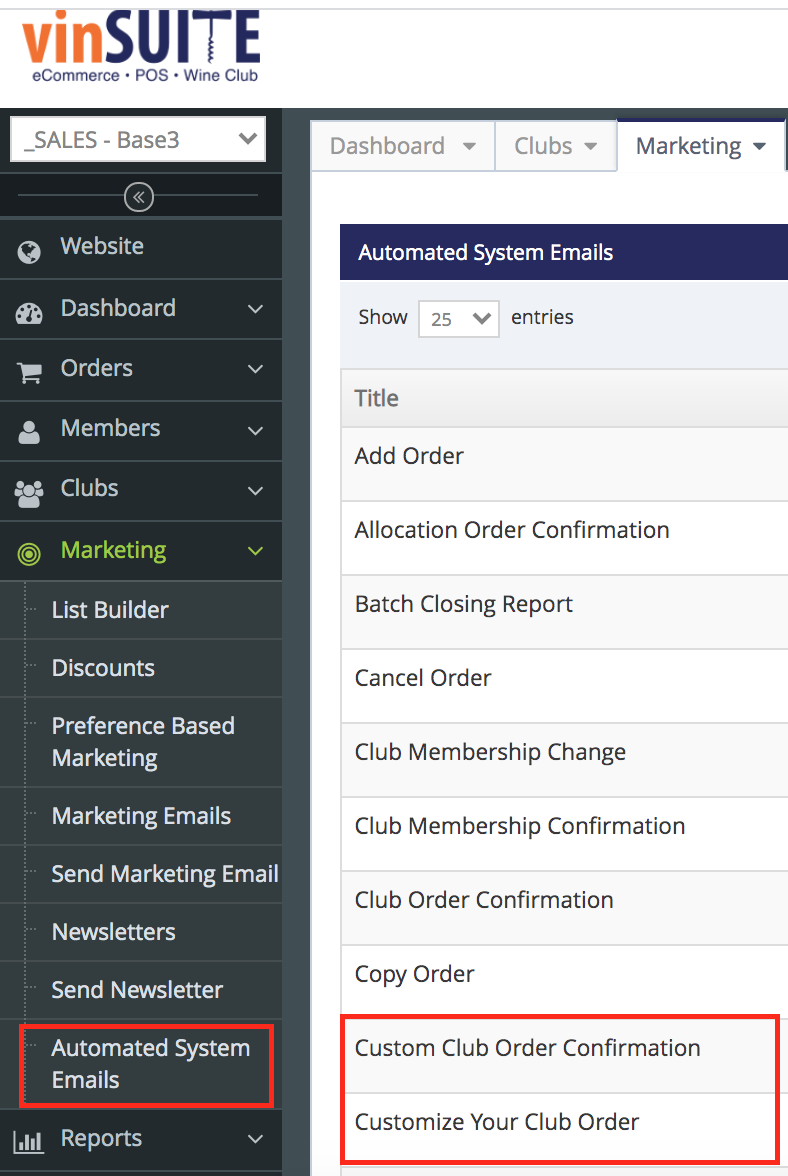
- Navigate to Marketing and select Automated System Emails
- Edit both the Customize Your Club Order and Custom Club Order Confirmation emails.
- Click the 'Activate this System Email' checkbox to allow this email to be sent.
- Click Save
Customize Your Club Order email: This email notifies the customer their club order is ready to be customized. You can control when this email is sent by selecting members with unprocessed orders during the club batch.
Note: You will learn more about the club batch process for custom clubs on the eWinery Create Custom Club Batch page.
Custom Club Order Confirmation email: This email notifies the customer once their club order has been customized. This confirmation email is sent after customer logs in to your website, customizes their own order, and checks out. Confirmation emails are sent out whether or not you choose to have an order set to Pending Custom Club Order or Completed status.
Note: Standard orders that an admin user creates in the custom club batch will receive regular club confirmation emails.
Include Any Notes for Custom Club Members on your Website
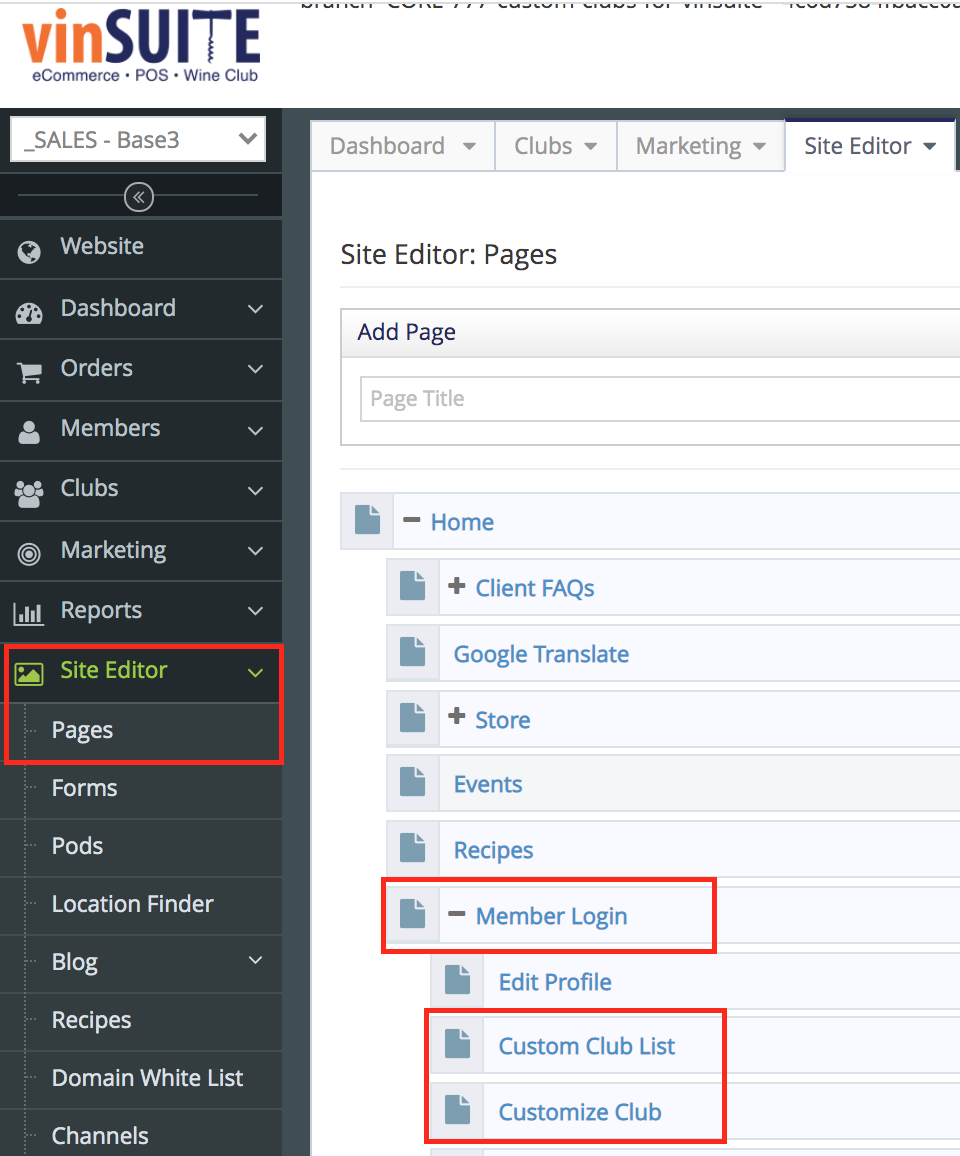
- Navigate to Site Editor in the left navigation. Under Pages, find "Member Login" and click the + to open up the pages under Member Login.
- Click on the 'Customize Club' page
- Enter and format any notes for custom club members (such as purchase requirements).
- Click the 'Save' button at the bottom of the page.
Note: These notes will be displayed on the top of the 'Customize Club' page on your website.
You can now continue to the eWinery Create Custom Club Batch page.